Lamb Merguez, Cous Cous, Spiced Carrots, and Lemon Yogurt Tahini Sauce

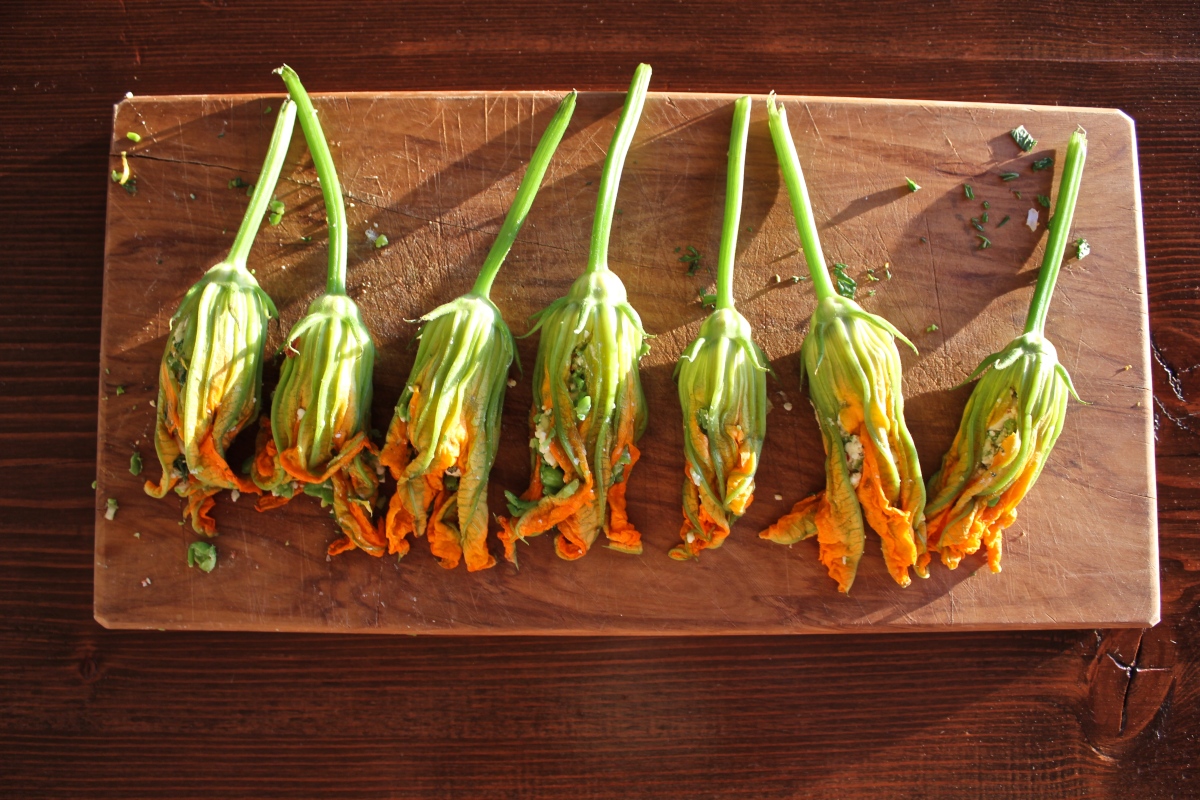
This meal was just constructed and subsequently devoured. I feel compelled to write about the experience while basking in the aftermath of its epic-ness. There’s nothing overly complicated about this food, it’s just simple and fucking tasty. In my opinion, that is the epitome of good food.

The ingredients are Moroccan inspired. I love Moroccan food. The flavours are bold, exotic, spicy, refreshing, and soulful. Try this recipe if you find yourself making the same things over and over again, it will knock your panties off! If you end up making this over and over again, well then I can’t help you, but I also can’t blame you.

If you happen to live in Vancouver, travel to Granville Island to obtain the Merguez sausage from Oyama Meats. These guys know what they’re doing.

IMG_3447

Ingredients:

Spiced carrots:

4 large carrots, peeled and quartered

One handful of parsley, minced

Half a clove of garlic, minced

Juice of one lemon

1 tsp ground cumin

1 tsp paprika

0.5 tbsp olive oil

Pinch of salt

Lemon yogurt tahini sauce (AKA holy shit this stuff goes with anything):

2 tbsp greek yogurt

2 tbsp sesame tahini

1 tbsp runny honey

Juice of one lemon

Half a garlic clove, minced

Cous Cous:

1 cup cous cous

2 cups water

1.5 tbsp butter

Half a handful of parsley, chopped

Juice of half a lemon

Pinch of salt

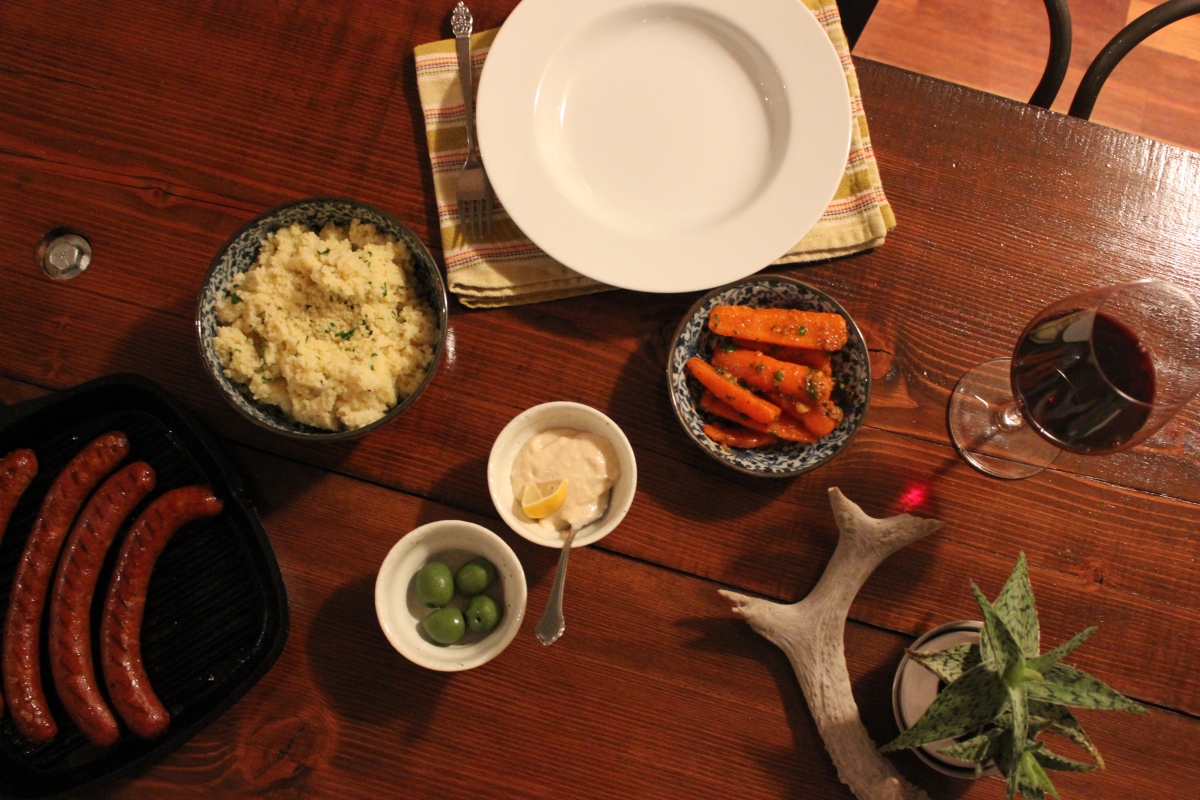
4 lamb merguez sausages, from Oyama if you live in Vancouver

One poached egg

Pea shoots or parsley for garnish

Directions:

Spiced Carrots:

  1. Place 1 cup of water in a small saucepan, add carrots and bring to a boil until the carrots are cooked. About 8-10 minutes.
  2. While the carrots are cooking, combine the spices in a bowl.
  3. Drain the cooked carrots, and add to the spice bowl. Toss to incorporate, then add the rest of the ingredients. Let sit for an hour or make the day before and refrigerate. Serve at room temperature.

IMG_3431

Lemon Yogurt Tahini Sauce:

  1. Combine all ingredients in a bowl and mix. It is now ready to serve.

IMG_3442

Cous Cous:

  1. Place the cous cous and water in a saucepan with a half tbsp of the butter and a pinch of salt. Bring to a boil, then remove from heat, cover, and let stand for 5 minutes.
  2. After five minutes, fluff up the cous cous with a fork, and add the parsley, butter, lemon, and a pinch of salt to taste.

IMG_3449

To finish:

  1. Cook merguez on a cast iron pan over medium high heat until cooked through.
  2. Serve sausage over bed of cous cous, with a poached egg and parsley or pea shoot garnish. Serve carrots and lemon yogurt tahini sauce on the side.

IMG_3461

Pairs well with mint tea. If you’re looking for wine, go with Stag’s Hollow Pinot Noir.

Enjoy!


Wild Mushroom Risotto

Risotto is epic. Think of it as a canvass to unleash your culinary creativity, since it is the perfect vehicle to carry an inspiring flavour to the plate! Follow the formulaic process for creating the risotto base, and then finish it with literally countless variations of accenting flavours. The basic recipe for risotto is astoundingly simple, and the key to a perfect risotto is all in the technique:

Saute onions with olive oil, then add rice and continue. Add hot stock, one ladle at a time while stirring the risotto to massage out the starch from the grains. Finish with butter and parmesan.

The perfect risotto should have an individual bite to each grain, not an overcooked rice-pudding like texture. It should also be freely flowing, and not overly stiff. This is one of the most common crimes against risotto. Let me say this, if your risotto sticks to the underside of an upside down spoon, it is too stiff! A proper risotto will slowly ooze, like a slow flow of lava!

Mushroom risotto is a classic dish for the fall. Mushroom stock can be created by soaking dried mushrooms, with porcini carrying the most prominent umami flavour for the base. The re-constituted mushrooms can then be added back into the risotto for flavour and texture. I like to finish the risotto with an assortment of whatever fresh mushrooms I can get my hands on, sautéed to bring out their earthy flavour.

Ingredients:

1 cup Arborio or Carnaroli rice

2 cups chicken, vegetable, or mushroom stock

10g dried porcini mushrooms

0.5 cup hot water

2 cups of mixed wild mushrooms, I used 1 cup of fresh shiitake and 1 cup of frozen chanterelles

1 small yellow onion, minced

1 clove garlic, thinly sliced

0.5 cup white wine or dry vermouth

Sprig of fresh thyme and sage, stems discarded and leaves chopped

0.5 cup fresh chives

Juice of half a lemon

2 tbsp butter

1 cup shredded parmesan, or other firm cheese

About 4 tbsp olive oil, enough for several “glugs” throughout the process

Salt and pepper to taste

IMG_3261

Directions:

  1. Re-constitute the dried porcini mushrooms by adding them to a bowl with the hot water. Let sit for about 15 minutes, then remove and roughly chop the mushrooms and reserve the liquid. In the meantime, add the stock to a saucepan and maintain at a simmer.
  2. If using frozen mushrooms, sauté in a spaced out layer over medium heat to remove the moisture. You can just let them sit if they are well spaced enough, until they are slightly browned and much more dry. Remove from pan and set aside for later use.
  3. Saute the fresh mushrooms over high heat with a glug of oil. Make sure to develop some good colour on the mushrooms. Remove from pan and set aside for later use.
  4. Reduce pan to medium high heat, add another glug of oil, then add the onions and garlic. Saute until onions just begin to brown, then add the rice and another glug of oil. Stir the rice and onion mixture continuously to coat all of the rice grains with a bit of oil. The idea is to toast the rice slightly before beginning to add the liquid. Just as the first rice grains begin to turn opaque, add the wine along with the sage and thyme, as well as the porcini mushrooms with their liquid and stir vigorously.
  5. After the rice absorbs about half of the wine, add a ladle full of hot stock and continue to stir. Don’t allow the risotto to become too dry throughout this process, as it will damage the individual grains and the consistency. The stirring should always be easy and the risotto flow back and forth in a wavelike motion if the pan is shaken. Continue to repeat this process one ladle of stock at a time until finished. The constant stirring is critical, as it massages out the starch of the rice grains and gives the risotto its characteristic creamy consistency. Don’t be alarmed if the rice has a slight bite to it after the stock is used up, as risotto should have this texture.
  6. Remove pan from heat once the risotto is done cooking, then add the sautéed mushrooms, butter, cheese, chives, lemon juice, and salt and pepper.
  7. Secret step: add 2 tbsp of good olive oil to the finished risotto, then gently fold ingredients together. This is the critical step for developing a lovely, oozing risotto.

Enjoy!

IMG_3266

Broccolini with Garlic and Red Chilli

Broccolini and chilli form a killer combination. This dish is a go-to when you want something easy and delicious. Usually I pair this with some form of grilled meat and call it dinner. As I write this, I’m realizing it would make a perfect side for a beautiful porchetta roast, especially along with some braised fennel. After biking to work all summer, I think my heart has finally recovered enough from my last pork belly escapade to try that out soon too.

This recipe works well with either broccolini or broccoli rabe. I prefer broccoli rabe, but some people find it to be too bitter.

You can also chop it up, then add it to some orecchiette with some grated parmesan and a healthy dose of olive oil for an exceptionally easy and delicious pasta dinner.

Ingredients:

1 bunch broccolini or broccoli rabe (rapini)

2 cloves of garlic, sliced

1/2 tbsp dried red chilli flakes

3 tbsp olive oil

salt and pepper

Directions:

  1. Set a saute pan to medium heat, then add the olive oil and garlic. Sauté for about 30 seconds, then add the broccolini. Continue to cook for 5 minutes, then add the red chilli flakes. Cook for another 2 minutes, then add salt and pepper and remove from heat. The broccolini should have a bit of crunch left to it, so don’t overcook!

Enjoy!

Romesco Sauce

You can put this stuff on anything! There are a tonne of variations; for this one I just took one of the simplest recipes I could find and added roasted tomato and dried chilis.

I made a big batch last week, and it was gone within a few days. I put it on chicken, grilled veggies, in a grilled cheese, mixed it into a vinaigrette, and then I ran out of sauce, so even I do not know the full extent of its capability!

This sauce is even vegan, gluten free, and paleo. So it’s a great sauce to make if you have dietary restrictions.

For a quicker version, use canned roasted red peppers and fresh garlic. Omit the tomatoes.

Ingredients:

1.5 pounds fresh red bell peppers

2-3 ripe plum tomatoes

6 cloves of garlic

1.5 cups of fresh almonds

0.5 cup of good olive oil

2 Tbsp red wine vinegar, or sherry vinegar if you have it

1 Tbsp dried red chilis

1 Tbsp smoked paprika

Salt and pepper

Directions:

1. Preheat oven to 450 degrees f. Place  red peppers in a deep sided baking dish and roast for 15 minutes, flipping after about 10 minutes. Add the tomatoes and garlic, then roast for another 10 minutes. You want a nice char on the peppers, so don’t worry about burning it since they will be peeled.

2. Place the roasted peppers in a plastic bag and seal, set aside the tomatoes and garlic. This will steam the peppers and make them easier to peel.  After about 10 minutes they will be cool enough to peel. Discard the skins, stems, and peels.

3. While the peppers are cooling, lightly toast the almonds in a sauté pan. Don’t burn them.

4. Toss all the ingredients in a food processor and pulse to a consistent paste. Don’t over do it, you still want some texture in the sauce.

Enjoy!

IMG_2992

Stuffed Zucchini Flowers with Sauteed Morels

I’ve never made zucchini flowers before, but I came across some particularly handsome specimens at a local farmer’s market and decided to give it a try. They’re not cheap, but they’re pretty cool looking and I’ve been curious about them for a while.

All the recipes I’ve seen tend to stuff the zucchini flowers with a mixture of cheese and things, then tempura batter and fry it. This sounds delicious, but I hate frying at home, so I decided to simply sauté the zucchini flowers for an easier and healthier option. For the stuffing, the possibilities are endless. Just combine any mixture of cheese, garlic, shallots, herbs, etc. and it will be delicious. The peas were a nice touch to give the stuffing a little bit of bite and some nice springtime flavour.

The morels on the side were a nice touch, and I basically included them because we are nearing the end of the season here in the Pacific Northwest. I’ll continue to incorporate my favourite mushroom any chance I get, and this recipe works!

IMG_2932

Ingredients:

6-8 Zucchini flowers

Half a cup of freshly shelled english peas

1/2 cup of fresh feta, I used Salt Spring Island Chili Feta

2 cloves of garlic, minced

A couple sprigs of mint, leaves chopped

Zest of one lemon

One red chili, finely chopped (optional)

Salt and pepper

Handful of morel mushrooms, cleaned of debris

Good knob of butter and a bit of olive oil

Directions: 

1. Combine the peas, lemon zest, half of the garlic, and a pinch of kosher salt in a mortar and pestle. Crush to make a rough paste. You still want some peas to remain more or less intact, but just beat up a little bit. Fold in the feta, mint, and chili to finish the stuffing.

IMG_2918
Feta, pea, and chili stuffing

2. Prepare the zucchini flowers by gently pulling away the petals to reveal what is apparently called the stigma (if you google “flower parts” like I did, it should come up as the first photo result). Cut off the stigma, because apparently it’s bitter.

3. To stuff the zucchini flowers, load up a good dollop on a small spoon. With the  zucchini flower on its side, gently pull away the top two petals and slide the spoon into the cavity. Use your finger to push the feta and pea mixture into the flower, and then close up the flower petals around it. Set aside so that you can get the morels started.

4. Heat a large stainless steel or cast iron pan to high heat, wait for it to get smoking hot, then add the morels to the pan dry. Make sure they are spaced well apart. After five minutes, give the pan a little toss to move the mushrooms around, then add a glug of olive oil, the butter, and remaining garlic. Sauté for another five minutes, keeping the mushrooms moving around a bit. Remove from the pan and season, then set aside.

IMG_2927

5. Add a little more olive oil to the same pan with the morels now removed, and return to medium high heat. Delicately place the stuffed zucchini flowers in the hot pan and arrange so they are well spaced, you may need to work in batches. Cook on one side for 5-6 minutes undisturbed, then remove with a spatula. The stuffing will be barely contained by the zucchini flower at this point, so you’ll need show some finesse here.

IMG_2944

6. To plate, I just haphazardly threw the morels on a plate, arranged the zucchini flowers on top in a parallel or crossed arrangement, then sprinkled some extra chopped mint and cracked pepper.

IMG_2938

Enjoy!


Lemon Braised Fennel

Just a little Wednesday morning quickie. 

This is a super simple dish! Serve it as a perfect side, add it to a risotto for an incredible depth of flavour, or just eat it for an amplified fennel experience. I served it as a separate course as part of a light Valentines dinner I made to serenade my better half. 

Ingredients:

1 fennel bulb, quartered 1 lemon

1/2 cup chicken stock

1 shallot

1 garlic clove

2 tbsp Olive Oil

1 sprig of fresh thyme 

Directions:

 1. Pre-heat oven to 325 degrees F. Heat pan to medium high, add olive oil, and add the fennel. Flip once a nice golden brown colour is developed, then remove from heat.

2. Add chicken stock and lemon juice to pan, then add the shallot, garlic, lemon zest, and half of the thyme.

3. Braise for 45 minutes, then remove. Sprinkle with the remaining thyme leaves and a touch of olive oil. Crack some pepper over and serve.

Crostini of Fava Bean and Pea Puree with Sauteed Morel Mushrooms

This dish is meant to show off the morel mushroom in all it’s earthy glory. The fava bean and pea puree is exceptional on its own, but forms a fresh, spring inspired bright green canvas for the morel mushroom to unleash its complex umami flavour and unique texture. For me, this dish performs the perfect marriage of the quintessential spring vegetables. It’s food you savour with every bite, and you wonder how a simple combination of things could ever be so mind blowing. If you’re going to make anything from this blog, make this. Serve it as an appetizer, and people will lose their minds!

If you’ve never had the pleasure of eating a fresh morel mushroom before, I implore you to seek some out at a local farmer’s market and make this dish. You will have to go now because the season is extremely short, from mid May to early June in the Pacific Northwest. Fava beans can also be found at the same time, usually at green grocers from May to mid summer.

One day, I will write about a successful mushroom forage, where the bounty is consumed on the spot with a camping stove and a select combination of ingredients. This is the dream, but to date I have been completely unsuccessful in my morel foraging escapades. In the meantime, I will venture further and further into the woods in the pursuit of my namesake. They are elusive little buggers, but I will find them one day!

Fava beans, peas. garlic, morels, and mint

Ingredients:

For the fava bean puree:

1 lb fresh fava beans (aka broad beans) in their shell, about 12 total

1/2 cup shelled peas

2 cloves of garlic, roughly chopped

3 sprigs of mint

Zest and juice of one lemon

1/2 cup shaved Pecorino Romano

1/2 cup high quality olive oil

Salt and pepper to taste

Directions:

To shell the fava beans is a two part process; it’s intimidating at first, but you’ll be flying through it in no time:

First, take the stem portion of the bean and pull back like you’re peeling a banana. A thin string should peel down the seam of the bean, allowing you to pull apart the sides more easily. Shell as you would a pea, and reserve the beans for part two.

Second, set a small pot of water to boil. Toss the shelled beans in the boiling water for 30 seconds. Remove with a slotted spoon and toss into an ice bath, or rinse with cold water to stop the cooking. To peel the individual beans, hold the fava bean like a guitar pick, with the black line at the end of the bean facing outwards. With your other hand, make an incision right above the black line with your finger nail, and peel down the end. Now squeeze with the fingers holding the bean, and it will pop out into two firm pieces.

Disclaimer: they have a tendency to fly across the room when you are popping them out of the inner shell, but your aim will improve (maybe).

A typical scene when making fava beans

To make the puree:

1. Place all the ingredients with the exception of the olive oil and the Pecorino Romano into a food processor. Pulse on and off, until all the ingredients are roughly chopped.

All of the ingredients prior to blitzing

2. Add the Pecorino Romano, and half of the olive oil, and pulse again a few times to combine. Do not puree to an indistinguishable mush, you want all the character and texture of each layer to come through.

3. Transfer to a bowl, and add the remaining olive oil, stir to combine. The result should look like this:

Proper consistency of the puree

For the sauteed morels:

8-10 fresh black morels, or whatever variety you have access to

1 tbsp olive oil

1 clove of garlic, peeled

1 tbsp butter

Salt and pepper to taste

Directions:

1. Heat a cast iron pan to high heat, add morels to the pan and allow to cook dry for 5 minutes. Don’t overcrowd the pan, you want high dry heat to really bring out the mushroom flavour and aroma.

This is what it means to not overcrowd the pan

2. Add the olive oil, then toss the morels around a bit for about 30 seconds. Add the butter and garlic, and continue to move the morels around. Continue to saute for 2 minutes, then season and remove from heat.

To make the crostini: 

Take a few slices of baguette or french bread, and lightly toast with some olive oil in the morel pan. Rub with a garlic clove sliced in half to finish.

To plate, spread a dollop of the fava bean puree over the crostini, then top with a few of the sauteed morels. Drizzle over some olive oil, and finish with some freshly cracked pepper and sea salt.

Enjoy!

The plated dish, perfection in my opinion!

iPhoto 2

Spicy Lemon Roasted Cauliflower

This is a shameless copy attempt at Nuba’s famous “Najib’s”, which are little cauliflower pieces spiced up and fried until crispy, then tossed with salt and lemon.

Fry if you prefer (I think the restaurant does), but I prefer to bake these to the point where charred edges start to form.

Serve it either in a mediterranean style wrap; on a platter with some olives, hummus, and pickled cabbage; or just eat it by itself!

IMG_2767

Ingredients:

1 head of cauliflower

1/2 tbsp ground cumin

1/2 tbsp paprika

1/2 tsp cayenne pepper

2 Tbsp grape seed oil, or equivalent

1 tsp kosher salt

Juice of 1 lemon

Directions:

1. Preheat the oven to 425 degrees C. Place a metal baking pan in the oven to pre-heat. Meanwhile, cut the cauliflower into 1″ pieces, toss in a bowl with the cumin, paprika, cayenne, and olive oil.

2. Remove the pan from the oven after about 5 minutes of pre-heating, and pour the cauliflower bowl into the pan. Make sure the cauliflower is well spaced, otherwise you effectively steam it instead of developing a crispy exterior. Looking from above, you should be able to see the bottom of the pan around each piece of cauliflower.

photo

3. Leave the cauliflower undisturbed for 30 minutes. You will want to bottom edge to develop good caramelization, and a little char, which won’t happen with cauliflower if you keep it moving.

4. After 30 minutes of roasting, now give the cauliflower a toss. You may need to free some pieces with a spatula. Turn the oven to broil on high, and place the pan back into the oven and watch closely for about 5 minutes, or until you are satisfied with the colour. We are just trying to get a little bit of extra char on some of the extremities.

5. Remove from the oven, and toss the cauliflower in a bowl with the salt and lemon juice, and serve.

Enjoy!

Simple Egg Pasta

A simple recipe that works for all different pasta shapes. Going the extra mile to make pasta from scratch is well worth it, and is surprisingly fun and easy. The second time you make it, you won’t think twice about whether or not it is worth the extra effort!

Ingredients:

1.5 cups flour (Type 00 if you can find it, but all purpose works too)

2 eggs

Glug of olive oil

pinch of salt

About 0.5 cup of extra flour for dusting the work surface

Directions:

1. Make a volcano shape with the flour directly onto a clean working surface. Crack the eggs into the center and add the pinch of salt.

IMG_2036


IMG_2037

2. Beat the eggs with a fork, while bringing in a little bit of the flour at a time. Continue to combine the ingredients, it won’t combine in one uniform mass, but a bunch of flaky bits.

IMG_2044

IMG_2046

IMG_2047

IMG_2048

3. Flour the working surface, and knead the dough for about 5 to 10 minutes; you will start to see moisture come to the surface while the dough combines into a uniform mass. You want a stiff, springy, dense dough – this is what gives pasta it’s desirable texture.

IMG_2050


IMG_2052

4. Toss the dough ball in a glass bowl with the olive oil, swirl it around for a couple seconds so that all sides are coated in oil. Cover in plastic wrap and let rest for 1 hour.

5. Roll the dough out using a pasta machine or rolling pin into your desired noodle shapes; if not using right away, dust the noodles with a bit of extra flour and drape over a pasta rack, or just wooden spoon propped between a couple of tall cans.

Enjoy in your favourite pasta recipe – remember that the cooking time will be less than dried pasta, so taste while they are cooking to determine the level of doneness!


Gnocchi with Brown Butter, Squash, and Crispy Sage Leaves

This is a very simple autumn inspired dish. It will work with a wide variety of squash, and each one will give the dish a different flavour and character so there is tonnes of room for variation by following the simple formula of this recipe.

I love the combination of brown butter and sage, but the lemon is really what brings the whole dish together. Opt for fresh gnocchi instead of store bought, and you won’t be disappointed! You could even take it one step further than I did by making butternut squash gnocchi instead of regular potato.

Ingredients:

2 cups fresh potato gnocchi (either store bought or fresh, recipe for this to follow)

1 small squash (about 500g), acorn, gem, or butternut squash work well

1 small bunch fresh sage

3 Tbsp olive oil

1/4 cup butter

1 lemon

1 tbsp hard cheese such as grana padano, or parmesan

Directions:

1. Cut the squash in half and remove the seeds, season the inside with salt and pepper, and add a small glug of olive oil to each and roast for 30 min at 350 degrees F, or until done (timing based on gem squash).

2. Meanwhile, add 1 Tbsp olive oil to a large saute pan and place on medium heat. Pick the sage leaves from the stem, and carefully arrange in the pan to avoid overlapping. Continue to saute until the sage leaves are crispy, but not burnt. Pick out individual leaves as they crisp up if the heat is uneven. Set aside crispy sage leaves for later and reserve the pan for the gnocchi (step 5).

3.  Bring a pot of water to boil and salt as you would for pasta. Add the gnocchi and drain with a colander once the gnocchi has floated to the surface. Ensure you remove as much water as possible to avoid oil splatters in the next step.

4. While the gnocchi is cooking, turn a small saucepan to medium-high heat and add the butter. Cook until the color begins to turn golden brown and the aroma changes, then remove from heat. Ensure you do not remove from the heat too late, as the butter will continue to brown somewhat.

5. Heat the large saute pan to high heat, and add a glug of olive oil. Add the gnocchi to the pan to saute, ensuring they form a single layer. If the pan is too small for this, work in batches. Saute the gnocchi until they develop a nice golden brown exterior with a slight crust. Reduce the heat to medium, and add the squash, brown butter, and the juice from the 1 lemon. Toss the ingredients lightly and continue to saute for 1 minute. Add the crispy sage, reserving a few for garnish. Season generously with salt and pepper, and toss to incorporate all the ingredients.

6. Grate the cheese over the gnocchi, and garnish with the reserved crispy sage leaves.