Pea and Bacon Risotto for the Nourish Project

Back in the summer I had to opportunity to be part of a very cool project by Gordon Neighbourhood House and the very talented photographer Matt Hanns Schroeter. The project is called Nourish, it’s an intimate community-based photo series showcasing people of Vancouver’s West End community cooking in their own homes. Every week we get to look at another individual from our vibrant Vancouver community cooking a dish that is meaningful to them. I just happen to be this weeks feature!

I prepared a Pea and Bacon Risotto with seared trout while talking with Matt about the dish, cooking, the creative process, and what food means to me. It was a very cool experience, and Matt took some fantastic photos!

12507090_991458807591977_7343623336822453919_n

Check out the Nourish page for a glimpse into my kitchen and to hear some of my ramblings about food!

Nourish Tom

Photo credit Matt Hanns Schroeter


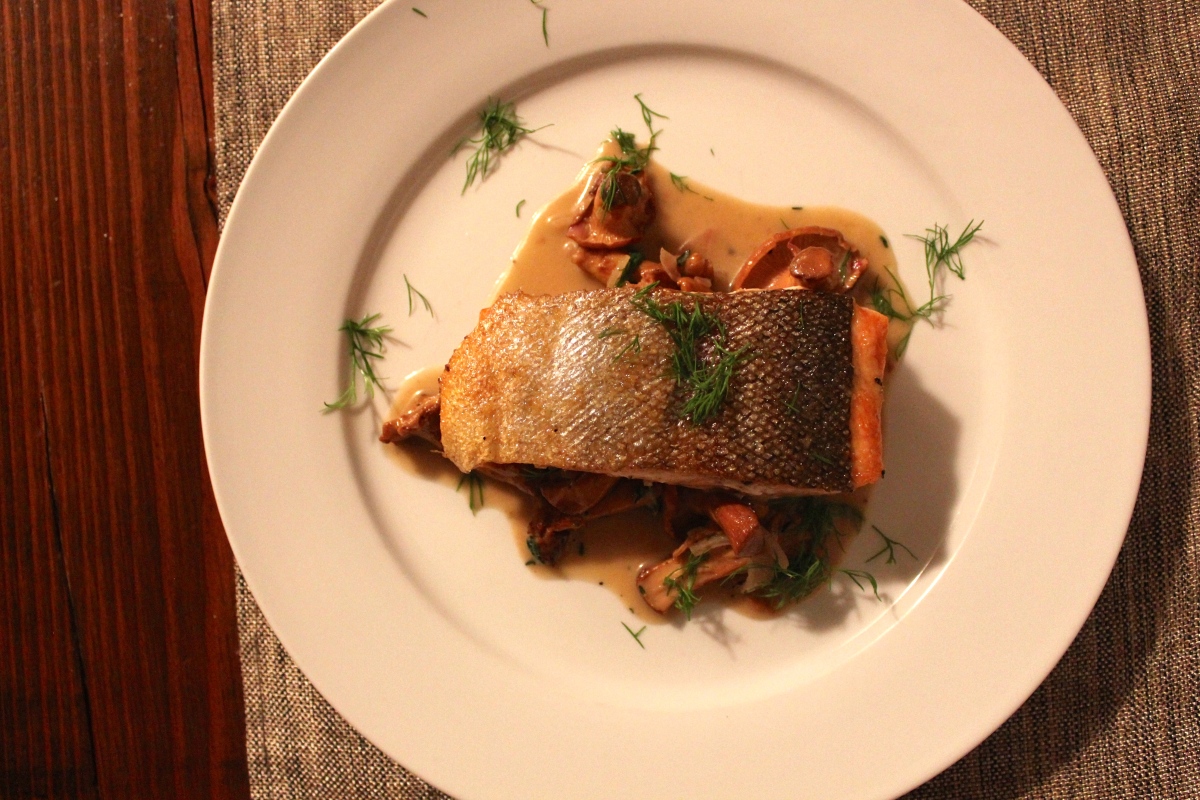
Steelhead Trout with Chanterelles


Early autumn is my favourite time of year. West swell begins to roll into the West Coast again, re-surging the various reef and point breaks back to life; the days are still reasonably long; amazing produce is abundant and inexpensive; and a plethora of delicious wild fungi begin to pop up in the coastal temperate rainforest, just waiting to be found by those keen enough to look. It’s an inspiring time of the year when you’re obsessed with creating food.

Trout with Chanterelle mushrooms is a classic and elegant combination. The dish could be further simplified to the point where the only additional ingredient is salt and pepper and it would still be outstanding. By adding a few finishing touches, the standout flavours are not compromised, but subtly accented. Exercise restraint when adding the ingredients, especially the butter, cream, and sherry. Cooking the trout requires some finesse as well, as the success of the dish hangs on achieving a beautiful crispy skin.

IMG_3170

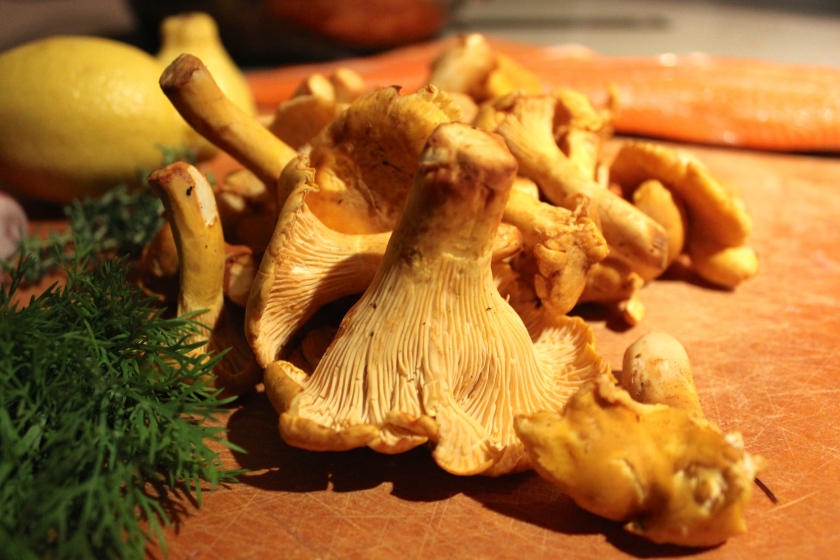
After a quick and unsuccessful search of the North Shore mountains in the morning, I decided to satisfy my Chanterelle fix by stopping by the Trout Lake Farmer’s market at noon

Ingredients:

2 or 3 portions cut from the freshest Steelhead or Rainbow Trout fillet that you can find (or catch)

1 tbsp olive oil

0.5 pounds of fresh golden chanterelles

1 shallot, minced

1 sprig of fresh thyme, leaves only

1 tbsp butter

1/4 cup cream

Juice of half a lemon

Dash of sherry

1 sprig of fresh dill, roughly torn

Salt and pepper


Directions:

  1. Season trout fillets generously, proper seasoning is essential when cooking trout. Heat a saute pan to medium heat, add olive oil, then add the trout fillets skin side down just as the oil starts to heat up. Do not wait for the pan to heat up to searing temperatures, since the skin will shrink and ruin the fillet if heated too quickly. Continue to cook for about 6-8 minutes, or until the skin is crisp and comes away freely from the pan. If the skin is sticking, the pan is either too hot, or hasn’t crisped enough. Flip the trout and cook for 1 minute, then transfer to a plate in a 180 degree F oven to hold while mushrooms cook.

    Trout with pilsner
    Searing trout with the company of some Main St Pilsner
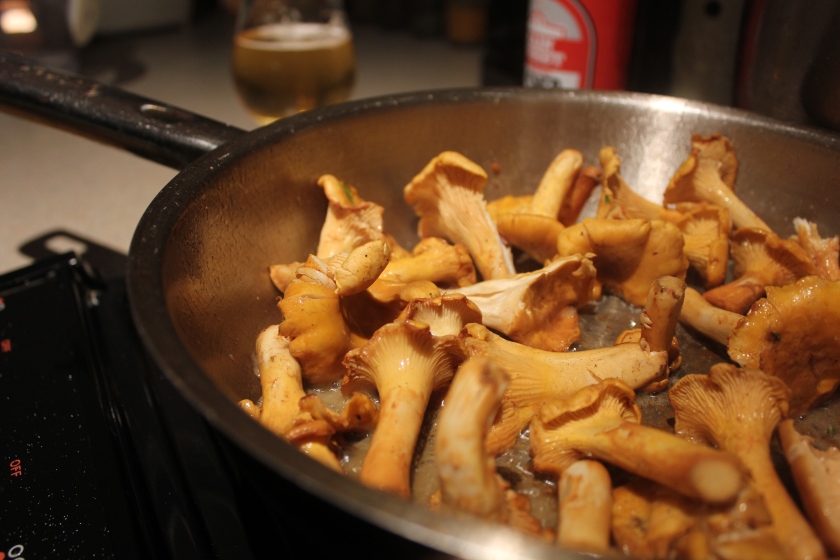
  2. For the next steps, you’ll need to work quickly so that the trout does not sit more than a few minutes. Turn the heat on the pan up to high, and wait 30 seconds or until it reaches searing temperatures. Add the chanterelles to the hot pan, ensuring they are not crowded (otherwise they will steam and not caramelize). Allow to cook undisturbed for 2 minutes.
  3. IMG_3178
    This is about as crowded as I’ll ever cook mushrooms. Any more, and they will steam.
  4. Add the shallots, butter, and thyme to the pan then toss the ingredients together in the pan to incorporate. Cook for 1 minute, then add the lemon, cream, and sherry. Continue to swirl the pan and allow liquid ingredients to reduce for 1 minute, or until a sauce like consistency is reached. Remove from heat, then add half of dill.
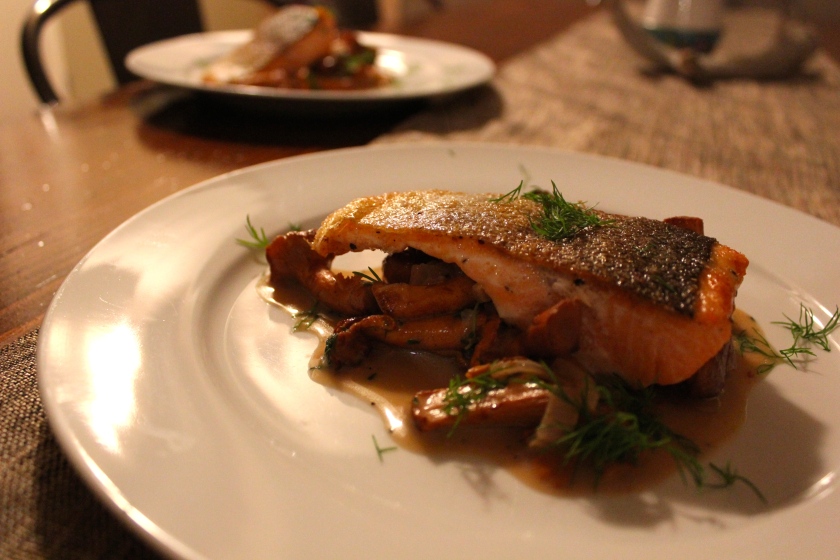
  5. Spoon the mushrooms onto a warm plate, then top with the trout fillet. Garnish with the remaining half of dill leaves.

Enjoy!

Trout with Chanterelles

Mussels and Frites 

A classic dish that’s great to share on a warm summer evening on the west coast. This one was made with a spicy thai red chili coconut curry broth, which pairs perfectly with the rich mussels.

I’ve perfected fries over the years, I hate deep frying at home, so my method involves baking the fries in the oven over an extended period of time instead to achieve similar results. The most important tip is to spread them out, and cook by color! When they’re golden, they’re done!

This broth packs quite a bit of heat, so scale back the chilis as desired.

Ingredients:

2 lbs fresh mussels, cleaned and de bearded

1 can coconut milk

A half cup chopped cilantro stems

1 shallot

2 garlic cloves

1 lime, zest reserved

1 tbsp coriander seeds

1 tbsp madras curry powder

Good handful thai bird chilis

3 large potatoes, cut into fries

4 tbsp grape seed oil

Salt and pepper

Directions:

1. Preheat the oven to 425 degrees F. Add half the oil to a large baking dish (make sure they are well spaced) and place in the oven to preheat. After 5 min, remove from oven and toss in fries. Immediately turn down heat to 375. Let the potatoes cook for 30 minutes before checking. They won’t burn at 375.

2. Meanwhile, make the curry paste. Start by adding shallots, garlic, cilantro, coriander, curry powder, lime zest, half of the chilis, and 1 tbsp of oil to a food processor. Pulse until you get a paste. Set aside and check the potatoes.

3. Potatoes will be ready to flip if they come free from the bottom of the baking dish with a light golden brown color and minimal effort. Toss around at this point a bit, then place back in the oven to continue to develop color. Keep doing this until the potatoes develop a bit more color and a bit of crispiness. Then turn down the oven to 300 degrees F.

4. Now that the potatoes are done, start on the broth. Place a large pot on high heat, then add the remaining oil and curry paste. Let cook for about 2 minutes, then add the coconut milk, lime halves, and the remaing chilis. At this point, you can also add lemongrass stalk, extra shallots, or ginger if you have them on hand. Sadly I didn’t. Let the broth come to a boil, then add the mussels and cook for 2 minutes, or until they open.

5. Serve immediately with the fries. Discard any mussels that didn’t open.

Enjoy!

Seared Scallops in a Coconut Curry Broth

I’m back! Rest assured, I have been doing plenty of cooking over the last three months but not so much writing. However, it now looks like I have enough material to keep a sustained stream of posts running for at least a couple months, so expect weekly updates henceforth!

It’s best to treat this as an appetizer. The overall cooking and prep time is minimal, so it’s a great first course when planning a meal for special occasions. I use a smaller 8″ pan that just fits enough scallops to still allow an individual sear on each, but prevents the coconut broth from over-reducing.

Serves two as an appetizer, but it will be a battle determining who gets to soak up the last drops of the broth.

Ingredients:

150g Scallops (the extra large ones)

1 Tbsp Curry powder (I used Madras)

1 Tbsp Olive oil

2/3 cup coconut milk

1 Shallot, minced

1 Thai red bird chile, roughly chopped

1 Lemongrass stalk, outer layers removed and cut into 4-5cm pieces

2-3 Chives, roughly chopped

2 Tbsp butter

2 Slices of good white bread

Salt and pepper

Directions:

1. Cut the scallops in half, so that you create two cylinders out of one scallop instead of two half-moons. This also creates an even number of scallops, which is imperative when it comes time to share this dish with another. Coat each side of the scallop generously with the curry powder, sprinkle on some salt and pepper too. Heat a sauté pan to medium-high and add the olive oil. With some tongs, gently arrange the scallops in the pan, being careful to not overcrowd (or else they will steam and not sear). Sear for 1-2 minutes, then flip and add the coconut milk. Turn down heat to medium.

2. Immediately add the shallots, lemongrass, and chile to the pan and give it a light swirl to incorporate the ingredients. Continue to cook on medium for 2 minutes, then add the chives and season with salt and pepper. Reduce heat to low while you get the toast ready.

3. Heat a separate pan to high for the toast. Butter the bread generously, place butter side down into the hot pan, and toast until the buttered side is crispy and golden, but the other side still has a lot of give.

4. Serve the scallops still in the pan with the coconut broth, with toast on the side to soak up the rest of the fragrant broth.

Enjoy!

Cod Cheeks with Sauteed Pea Greens, Wasabi Vinaigrette, and Crispy Shallot

Sometimes creativity is inspired out of a lack of choices, this is one of those cases. I had recently returned from a trip to God’s Pocket Resort, located North of Port Hardy, BC. Our fridge was nearly empty after returning, but I was keen to taste the bounty of the trip. This particular ling cod was caught on the way back from surfing a remote beach break on the West coast of Canada’s mainland. Catching the fish was a magnificent end to what was already an incredible and unique adventure.

10609234_10100257543523736_851217904_n

Filleting a fish like this is no easy task for us novices, but the advantage is you can take some cuts typically unavailable at your local fish monger and especially rare at the supermarket. In this case I’m talking about the cod cheeks, but I’ve heard that salmon belly is quite delicious as well, stay tuned for future posts! Halibut cheeks are more readily available, and can be easily substituted in this recipe:

1 Shallot, thinly sliced

About 2 tbsp light olive oil, or grapeseed oil (a few glugs, technically speaking)

2 Cod (or halibut) cheeks

Good bunch of pea shoots

Wasabi vinaigrette, ingredients follow

Salt and pepper to taste

For wasabi vinaigrette:

1 Tbsp wasabi mayonnaise, (or 1 Tsp. wasabi paste + 1 tbsp mayonnaise)

1 Tbsp rice vinegar

2 Tbsp light olive oil or equivalent

Mix all vinaigrette ingredients together, whisk to combine, and set aside for use.

To make:

1. Preheat large saute pan to medium heat, add 1 tbsp of oil and the shallots. Saute shallots for about 15 to 20 minutes, or until a nice golden brown colour and crispy texture develops. If the shallots are browning too quickly, lower the heat. Keys are to keep the shallots spaced enough that oil surrounds each individual piece and to saute long enough to develop the crunchy texture. Set aside once cooked.

IMG_1352

2. Heat the same pan to medium high, then add another small glug of olive oil. Season cod cheeks with salt and pepper, and saute for 5-6 minutes. These will cook quite quickly, so the challenge is to get some color without overcooking. Set aside once done.

3. Heat saute pan to high, then add pea shoots and toss for 30 seconds. Remove from heat and add Wasabi vinaigrette to pan and toss a few times. Transfer to plate, and top with cod cheeks and crispy shallots. Serve immediately.

Enjoy!